How do you feel about homemade valentines? I'll confess when my kids were in preschool we loved to make them together. We had so much time and it was a fun activity to do together. But then one went to elementary school. And then two. And then we were sending in valentines for their class and the class next door! My kids loved making them, but it started to become one more thing on our to do list, instead of a fun way to spread joy to their … [Read more...]
A Process Art Activity Kids Can’t Resist

Process art projects are always fun for kids because they are about the process and not the end result. They love using their own creativity to make something without worrying about what their creation "should" look like. Process art sounds fancy but all it really means is letting explore materials without having to adhere to a certain end product. It's great for fostering creativity and making dinner. Yep. Process art engages kids and allows you time … [Read more...]
Love Bug Footprint Puppet Craft
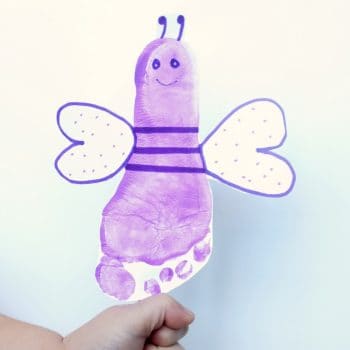
I can not resist making footprint keepsake art with my kids. Those sweet little feet will not stay like that for long. So while they are little and enjoy crafting with mom we will make as many footprint and handprint keepsakes as we can. With Valentine's Day coming up we made a love bug footprint puppet craft. The kids and I just love how cute they turned out! Love Bug Footprint Puppet Craft Footprint Craft Supplies: pink and purple … [Read more...]
Love Boat Valentine Card Holder Craft

Valentine's Day is such a fun time to craft with kids! They can make homemade cards and presents for friends and family and create their own valentine card holder to store all of the cards they receive. All three of my kids need to make a valentine mailbox for school so we have been busy creating this weekend. My daughter decided she wanted to make a love boat valentine box this year! Valentine Card Holder empty tissue or shoe … [Read more...]
Heart Number Matching Activity
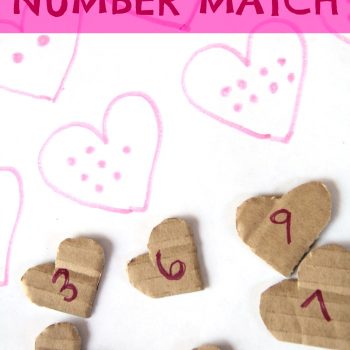
Hands on learning makes new ideas fun. This Heart Number Matching Activity is a creative way to introduce counting and number identification to preschool children, all with a Valentine's Day theme! We came up with this idea one cold day when we needed an indoor activity. It's a quick math activity you can throw together and uses materials you probably already have in your home. Learning to identify the number of dots on a die is an important … [Read more...]
Valentines Day Printable

With the most lovable holiday just around the corner, we're sharing a learning Valentine's Day printable for your kids! They will be able to practice some basic math skills with these. (affiliate links included below) Valentines Day Printable These lovely Valentines Day printable set has two pages that focuse on basic math. On the first worksheet kids have to count the number of dots in each of the balloons and connect it to the child that … [Read more...]
Homemade Valentine for Kids: Play Dough Snowman

My kids love to make homemade valentines to for their classes each year. The key for us to to keep the valentines simple enough that they don't want to stop before they have enough for all of their friends. One super easy idea is to use our white play dough recipe to make homemade snowman valentines! DIY Play Dough Valentine: DIY snowman valentines are so easy and there is really no wrong way to do it! Basically you … [Read more...]
Valentine’s Day Learning Activities
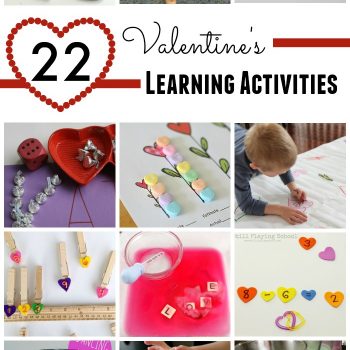
My kids love holidays. They get so excited about all the new decorations, crafts, and excitement surrounding each one, and Valentine's Day is no exception. I love building on their enthusiasm by incorporating holiday themes into our learning activities. This collection of Valentine's Day learning activities is full of ways to add a little Valentine's spirit into reading, math and science. Valentine's Day Learning Activities Reading Heart … [Read more...]