One of the basic rules of parenting is that kids are willing to play quietly as long as you don't need them to. The second you need to make a call or get into the shower they "need" you or immediately get into everything and anything they aren't supposed to play with! That's why busy bags and quiet time activities are so popular with parents of younger kids. We all need to be able to pull something out to keep the kids happy so we can get … [Read more...]
Printable School Bus Ten Frame Activity
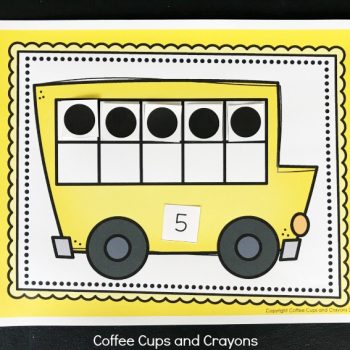
Ten frames are a great way for kids to develop number sense! While kids are building and taking apart numbers on a ten frame they are starting to visualize what numbers really represent. This understanding is the first step in being able to explore numbers and relate them to each other--key math skills for young kids. This free printable school bus ten frame activity is a fun way for preschoolers, kindergartners and first graders to play and learn … [Read more...]
Learning Shapes Printable Pack for Preschoolers

Playing with shapes again and again is how preschoolers learn identify and create them. This free learning shapes printable pack is jam packed (pun intended) full of ways for kids to play and learn with shapes. You can use the pages to play with shapes, create a quiet book, make a hands on busy bag, and even move and learn with gross motor games! Who knew one free printable pack could be so much fun? This 14 page printable pack includes … [Read more...]
Make ABC Practice Fun with a Christmas Stocking Game

There's no denying that the holiday season is here. What better way to combine the excitement of Christmas than with this Christmas Stocking Game that's full of ABC Practice Fun. Not only does it get your toddler working on their fine motor skills and creativity, but it also has them creating and then using what they've made as well. So many times there are things that children whip up and leave sitting on the shelf. Not this ABC Practice … [Read more...]
A Fun Way to Take a Neighborhood Walk with Kids

With everyone home more this spring we all have been a lot of time in our backyards and in our neighborhoods. Bored with it yet? Don't worry! You are not alone! We all are feeling antsy at this point. Our neighborhood participated in a shamrock walk and a teddy bear walk the first couple weeks of staying at home and it was a fun way to put a new spin on your neighborhood walk. Then we all got busy with distance learning and the themed … [Read more...]
Arctic Animal Snow Dig Activity and Printable

Stuck inside and need a fun activity you can prep in minutes? Then this arctic animal snow dig is perfect for you! In just minutes you can use these free printables to make a fun arctic animal themed I Spy game. That's right, while your kids are busy playing and learning you can take a break and drink your coffee or check your email. Boom! Arctic Animal Snow Dig Activity This arctic animal snow dig activity is super easy to set up. The … [Read more...]
Silly Thanksgiving Jokes to Make Your Kids Laugh

If you're looking for some super-silly Thanksgiving jokes that are certain to have everyone cracking up, you're going to love these great free printables. One of the biggest perks of being together during the holidays happens to be the food and the conversations. But this Thanksgiving holiday, it's time to let your children take it up a notch and try out their delivery and timing with jokes. The best part about these hilarious … [Read more...]
Summer Kindness Calendars for Kids

What if I told you that there was something fun you could do with your family this summer that would cut down on whining, help your family bond, teach your kids valuable life lessons and make the world a better place all at the same time? Would you think I was crazy? Or that I was about to suggest the latest parenting book or e-course? The truth is making this summer one full of memories is pretty simple. The secret is teaching kids to … [Read more...]