Have you done the rubber egg science experiment before? It is such a fun one for kids!
You only need a couple supplies to make a rubber egg and the results are so impressive.
Rubber Egg Experiment Supplies:
- cup
- egg
- vinegar
- notebooks to record experiment
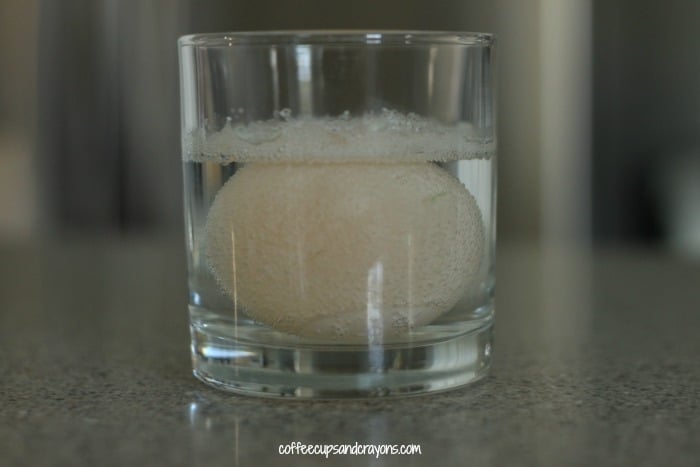
Ask the kids to predict what they think will happen if you leave an egg in vinegar and have them record their thoughts in the notebooks.

We put the egg in a cup and covered it with vinegar. The kids noticed there were bubbles on the shell of the egg immediately.
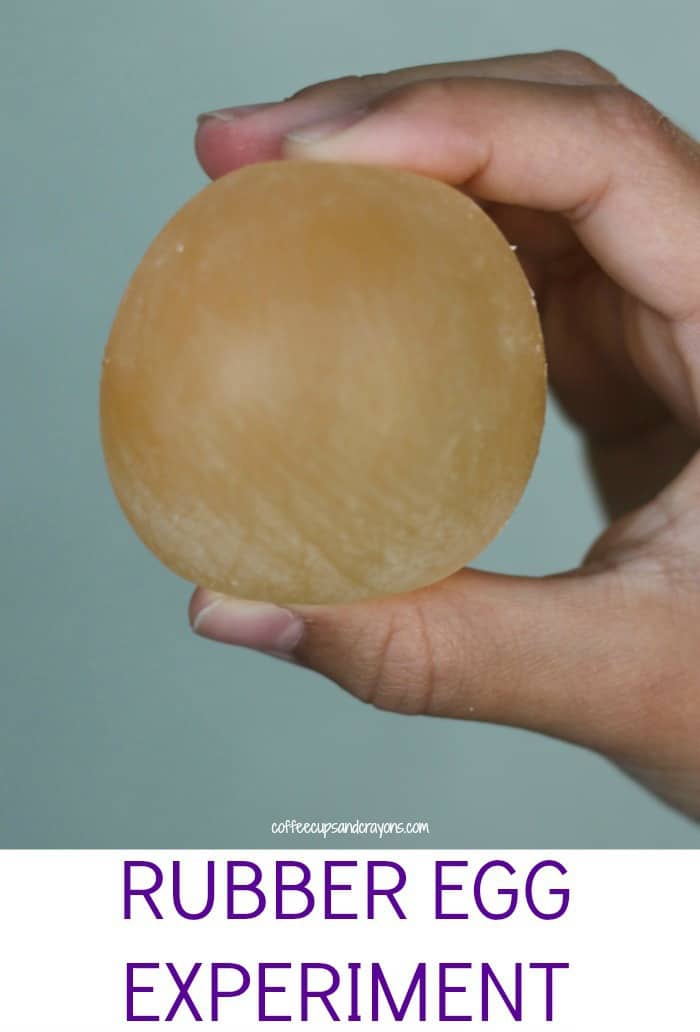
We left it in the vinegar for two nights and continued to watch it. Slowly the shell of the egg disappeared and the egg got bigger. The vinegar dissolves the shell but keep the membranes of the egg intact giving it a rubbery appearance.
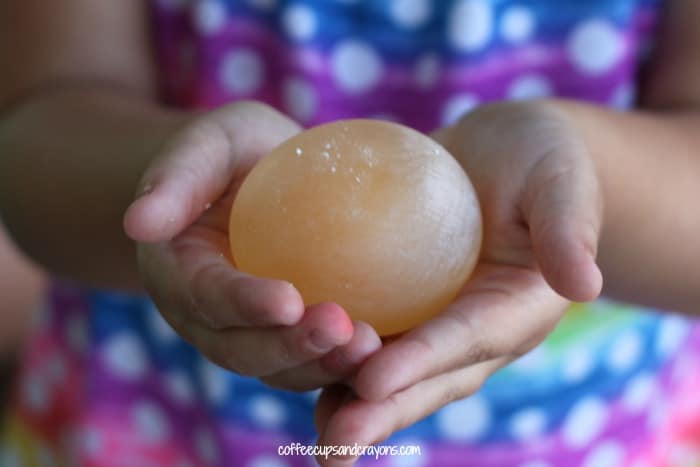
The kids thought it was amazing and all took a turn holding it. It is still an egg though so make sure if you do this with your kids you supervise them and have them properly wash their hands.
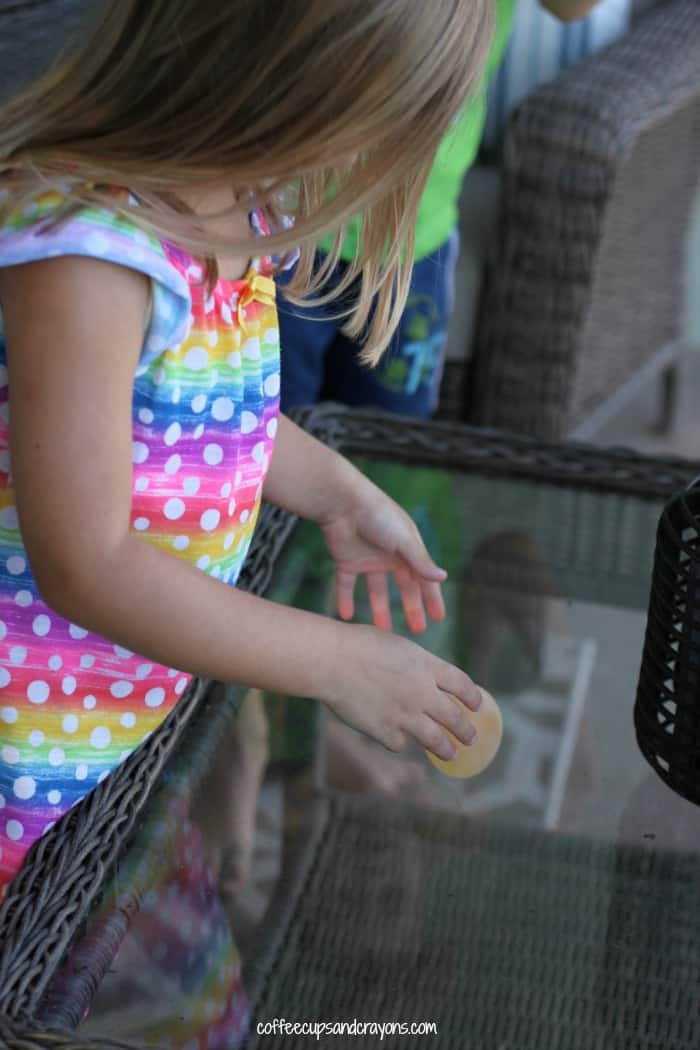
You can even gently bounce the egg on a flat surface!
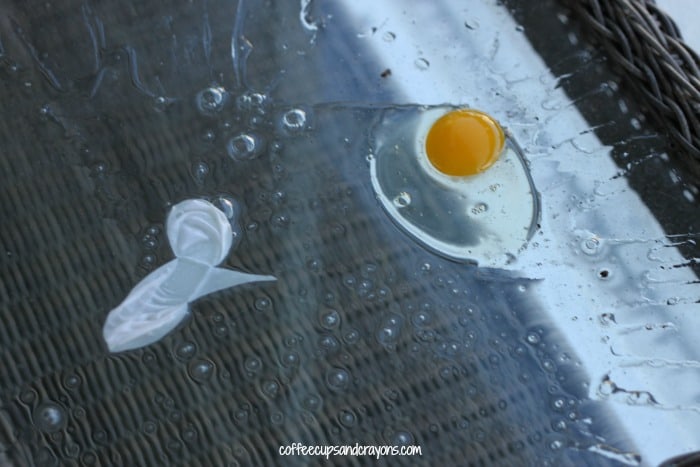
Be careful though. If you bounce it too hard the membrane will break and you’ll have a big mess!
Doing experiments at home is such a great way to get your kids to start thinking like scientists!
Wow, that’s really big mess.. 😀 But it’s look fun!!
Yes! I would not recommend the mess, but the rest was cool! 🙂
White vinegar or any type?
I used white but I have heard lemon juice works too!
Couldn’t you boil the egg first and do the same thing?
Probably! If you try it let me know!
I am going to try boiling it first, but I don’t believe that it will work because the reason the egg has a more rubber look and feel to it is because of the osmosis of the vinegar. I don’t think osmosis works unless it’s a liquid – although I don’t know that for sure. I will try this tomorrow and post our results! 🙂
I can’t wait to see!
Do you refrigerate for those 2 days?
BTW thanks for sharing.
No. And ours didn’t smell at all which I was worried about.
Woe I have never seen that before! How crazy! I am glad you showed what happens if you bounce it too hard! Ha, but what a cool experiment!
Yes! All big bounces should be done outdoors!
Awsome thanks
so much fun but how long does it last… like after its done making?
It will last days in the vinegar but once you take it out then you won’t want to save it any longer.
Would the egg still be edible? I mean if you fry or cook it? Or will it taste of vinegar? That#s probably something worth finding out.
Hmmmm…I don’t totally know what would happen if you fried it! I’m guessing with all the vinegar (and having sat out for days) that it would be gross, but I don’t actually know! If you try it report back to us!
I don’t think it would be edible at all if the egg was not refrigerated since you’re not supposed to eat food that’s been left out for more than 4 hours and this was left out for 2 days. If it can be done in a fridge then maybe? Or will it have too much vinegar in it at that point? Curious.
And I thought the nail in the glass of Coke experiment was cool. This beat that hands down. Can’t wait to try this one with the kiddos!
You are correct that the process going on here is osmosis. The vinegar dissolves the egg shell, but then the vinegar transfers through the skin into the inside of the egg. If you put the vinegar filled egg into a cup of corn syrup, you will find that the vinegar passes out of the egg lining into the corn syrup and the egg sac becomes much smaller, with only the yolk and egg white remaining in the sac. It is a great way to get kids to hypothesize what will happen before each procedure. It also gets them to ask questions to do further experiments. Great fun!
Very cool! We’ll have to try it!
No worries if the egg breaks: pour SALT over it and wait, then just gather the dirt very easily
Awesome! Thanks for the tip!
CAN I PUT A LITTLE BIT OF WATER IN THE VINEGAR
I did this experiment and there was some weird brown stuff floating around in the vinegar… is this normal?
Yes the shell is disintegrating. 🙂
Thank you so much for sharing this. I am looking forward to doing this for a science project.
It’s so cool!